Some third-party vendors provide large GPX or KML files that map all of the trails and roads in a specified area. Typically the roads and trails are saved as tracks and/or routes and it can be difficult to view some areas due to the density of the data. Thus transforming the track and/or route data into a custom map source can allow the user to easily view the saved track as well as their own track.
1. Import the shapefile data into Mapbox Studio.
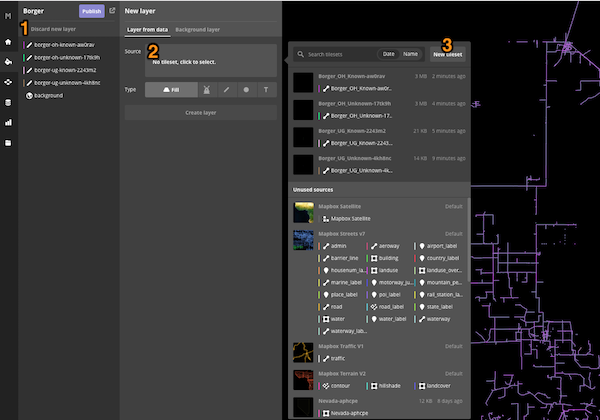
- Start with an Empty Mapox Studio Style
- Import each .zip file as a New Layer
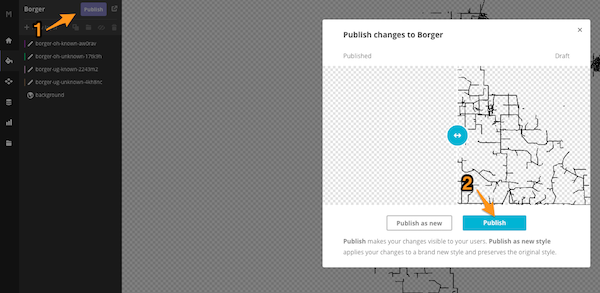
- Publish the Mapbox Studio Style
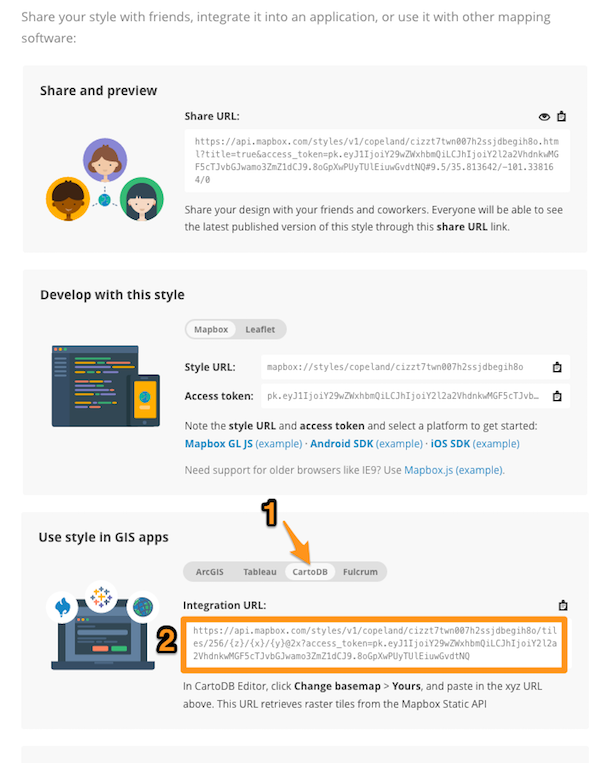
- Select “Preview, develop & use”
- Within the “Use style in GIS app” section, select “CartoDB” and copy the URL
2. Use the CartoDB URL from Mapbox Studio and import it as a custom map source with these steps: Adding a TMS Map Source
3. Transfer the custom map source to your device by syncing with gaiagps.com
- iOS: Back-up Your Data to the Web
- Android: Back-up Your Data to the Web
- After syncing, you can load the custom map into the main map through the Custom Imports section of the Layers menu.
---
Note: If you are unable to upload your GPX or KML file directly to Mapbox Studio. Follow these steps to convert your GPX/KML file into a shapefile file using free to download QGIS program.
1. Use QGIS to convert the GPX, KML, or KMZ into a shapefile (.shp)
- Open the file with QGIS
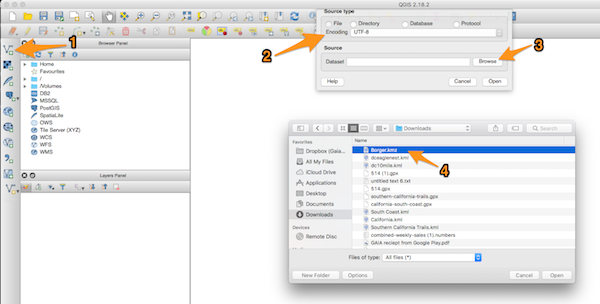
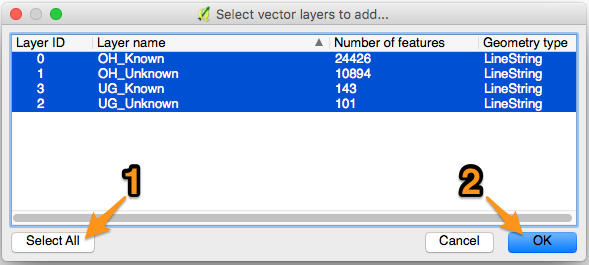
- If the file has multiple sections, a pop-up window will appear listing the sections. Select all of the vector layers, then click “OK”.
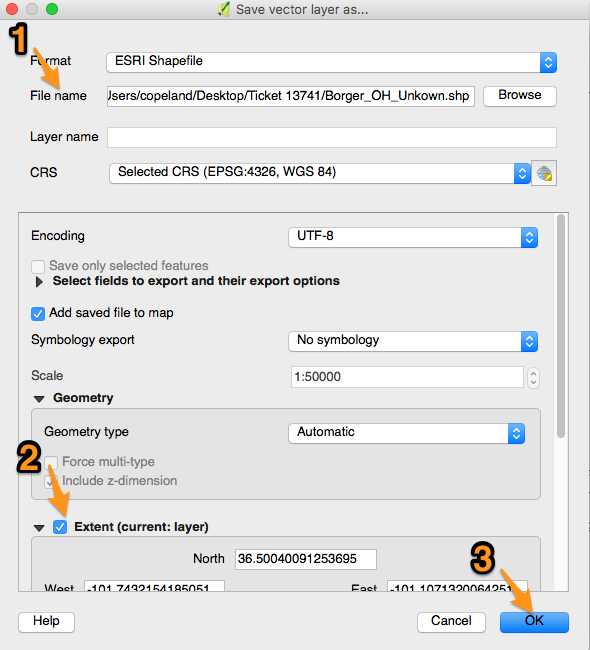
2. Save each layer in QGIS as a shapefile by right clicking on one of the layers and selecting "Save As"
- Name the shapefile and check the Extent box for each layer
3. Compress the 5-6 files produced by QGIS (.shp, .qpj, .prj, .dbf, .cpg, & .shx) into a zipped folder.
- If the original file produced several layers in QGIS, the files for each layer will need to be compressed into individual .zip files