
This article will show you how to create and edit both straight-line, snap-to-trail, and freehand mode routes in Android. You can also use routes to measure distances on the map.
- Create a New Route
- Reverse a Route
- Back to Start
- Out and Back
- Freehand Mode
- Download Offline Maps for Your Route
- Edit an Existing Route
- Common Questions About Troubleshooting
Create a new route
1. From the main map, tap the 

2. Tap wherever you want the route to start, and a white dot will appear at your starting point. To move the selected starting point, tap and drag the white dot to the desired location.
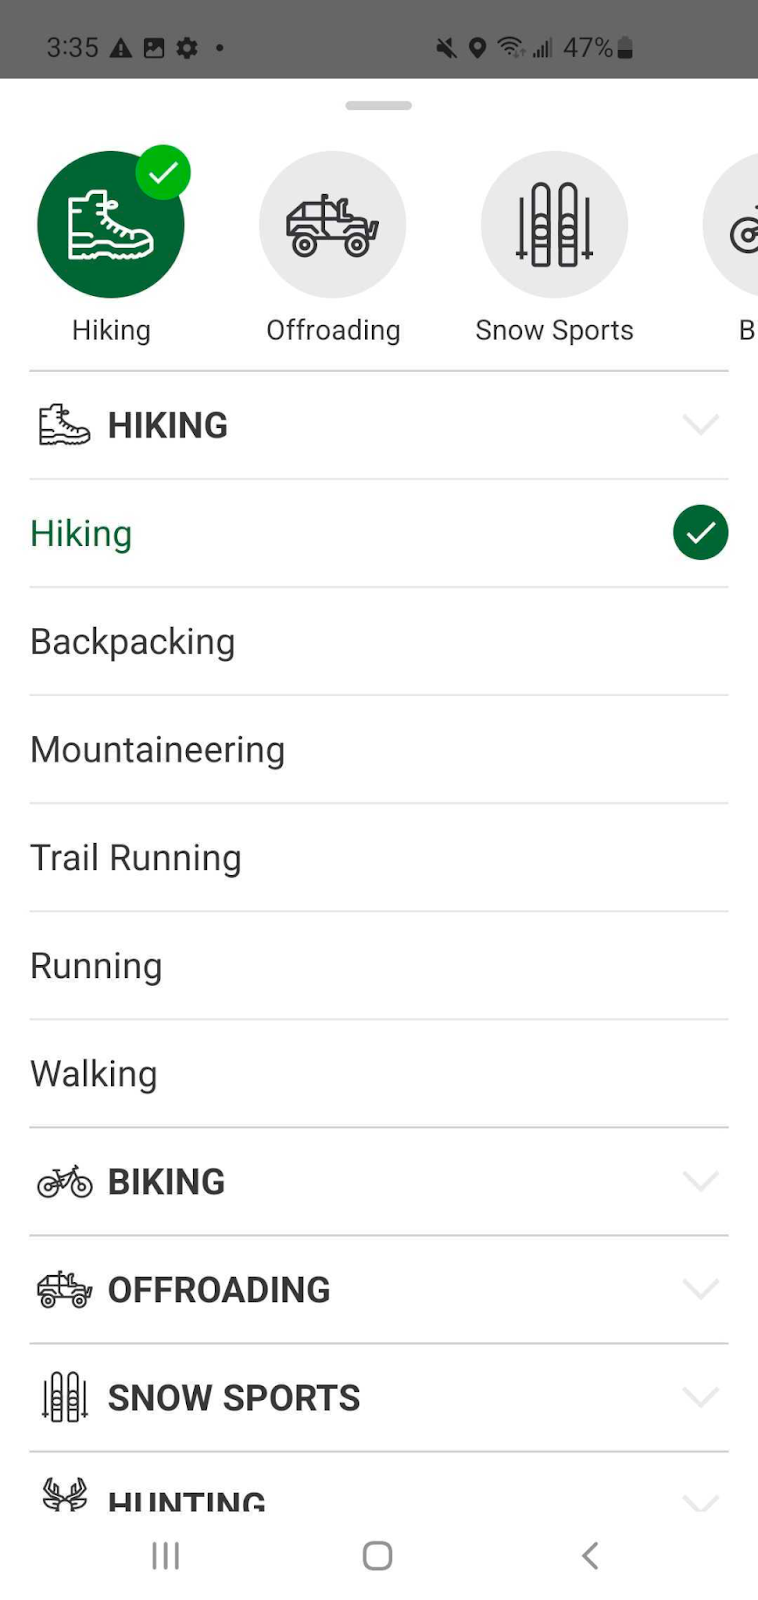
3. Tap the activity selection icon and select an activity for your route from the activity selection menu. Your chosen activity will partially govern the routing result, for instance, choosing a driving activity will mean that routes do not snap to trails where driving is not permitted.
4. If you would like your route to automatically snap to the trail as you plot your route points, tap the magnet icon so it is green to turn on snapping. If you prefer to create a route with straight lines, turn the snapping tool off.

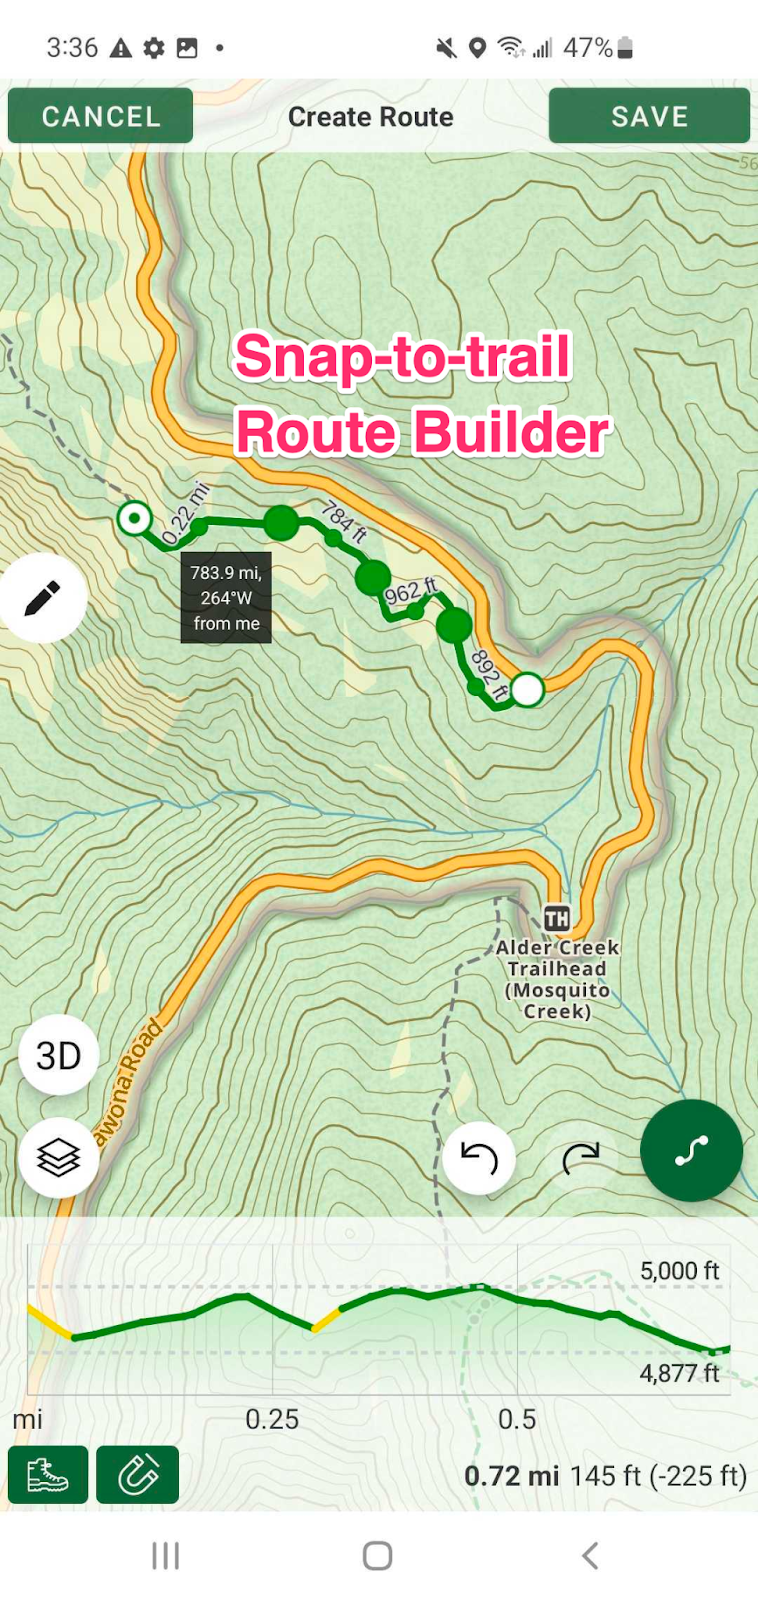

5. Tap anywhere on the screen to create a route point to plot your next point.
If needed, you can drag the dots (route points) to change the location of any route point in the middle or either end of a route.
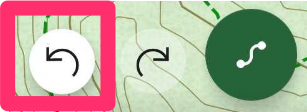
6. Tap the undo button to delete the last segment.
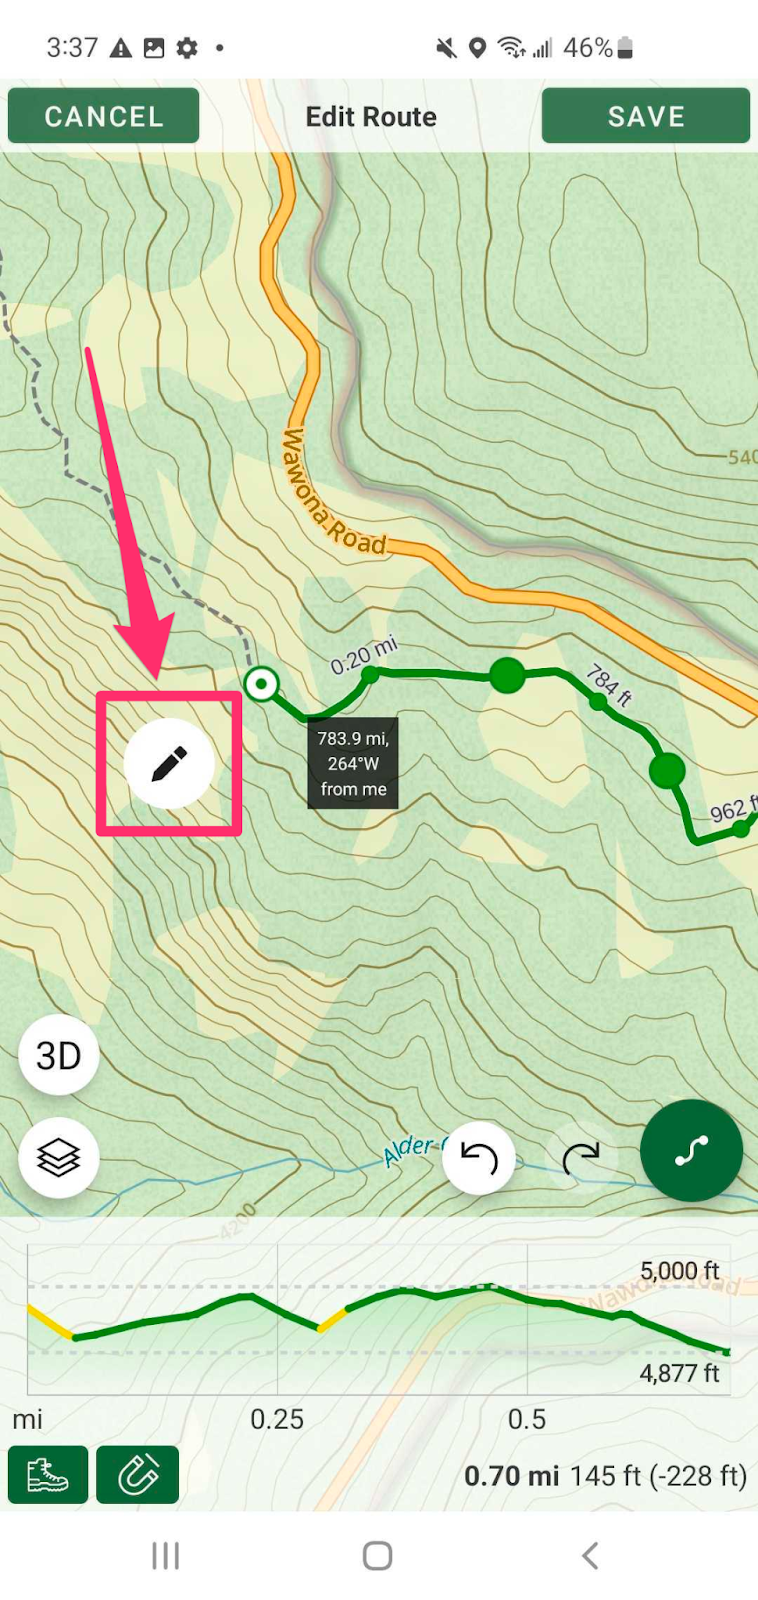
7. To delete a route point or to turn a route point into a waypoint, tap a green dot and then tap the pencil icon.
Note: Snap-to-trail routing only works with trails and roads displayed on Gaia Topo. Follow these steps to make Gaia Topo the active map layer.
To use snap-to-trail route building while offline, you must download offline routing data when you download maps for offline use.
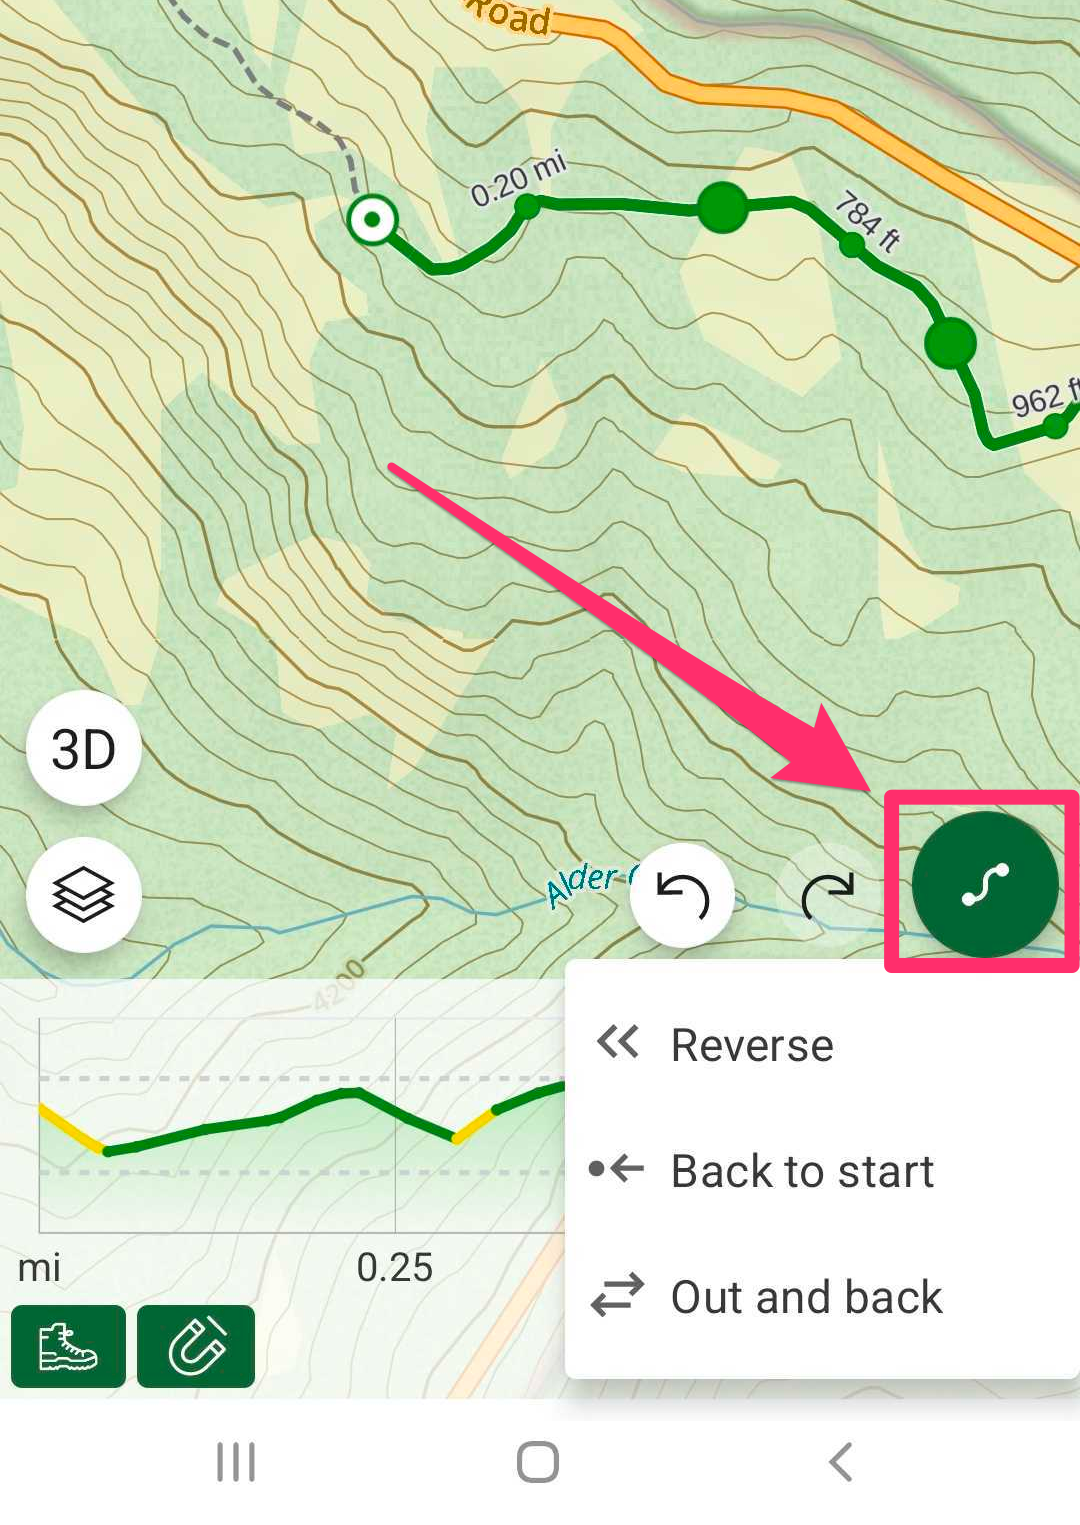
8. Tap the green auto-complete button to see several options for advanced routing tools: Reverse, Back to start and Out and back.
Reverse
Reverse switches the route start and endpoints.
Back to Start
Back to start completes a loop to the starting point. It will route along the nearest trail. If you experience unexpected results, tap the undo button and then add another route point closer to the final destination and try again.
Out and back
Out and back completes a one-way route by following the same path back to the starting point.
Freehand Mode
With freehand mode, you can draw a route anywhere you want.
- To turn on freehand mode, tap the freehand mode icon so it turns green.
- Tap wherever you want the route to start, and a white dot will appear at your starting point.
- To freehand draw your route, tap and hold down the white dot, and drag the white dot to create a desired route. You can draw your route on any terrain, including rivers, lakes and areas with unmarked trails.
- To turn off freehand mode and activate point-to-point mode, tap the freehand mode icon so it is white.
9. When you finish plotting the route, tap Save at the top-right of the screen.
10. From the Name and Save screen, you can:
- Add a route title
- Add notes
- Change or choose an activity (e.g., hiking, off-roading, skiing)
- Change the color of the route
- File the route into a folder
- Download offline maps for the route
Download offline maps for your route
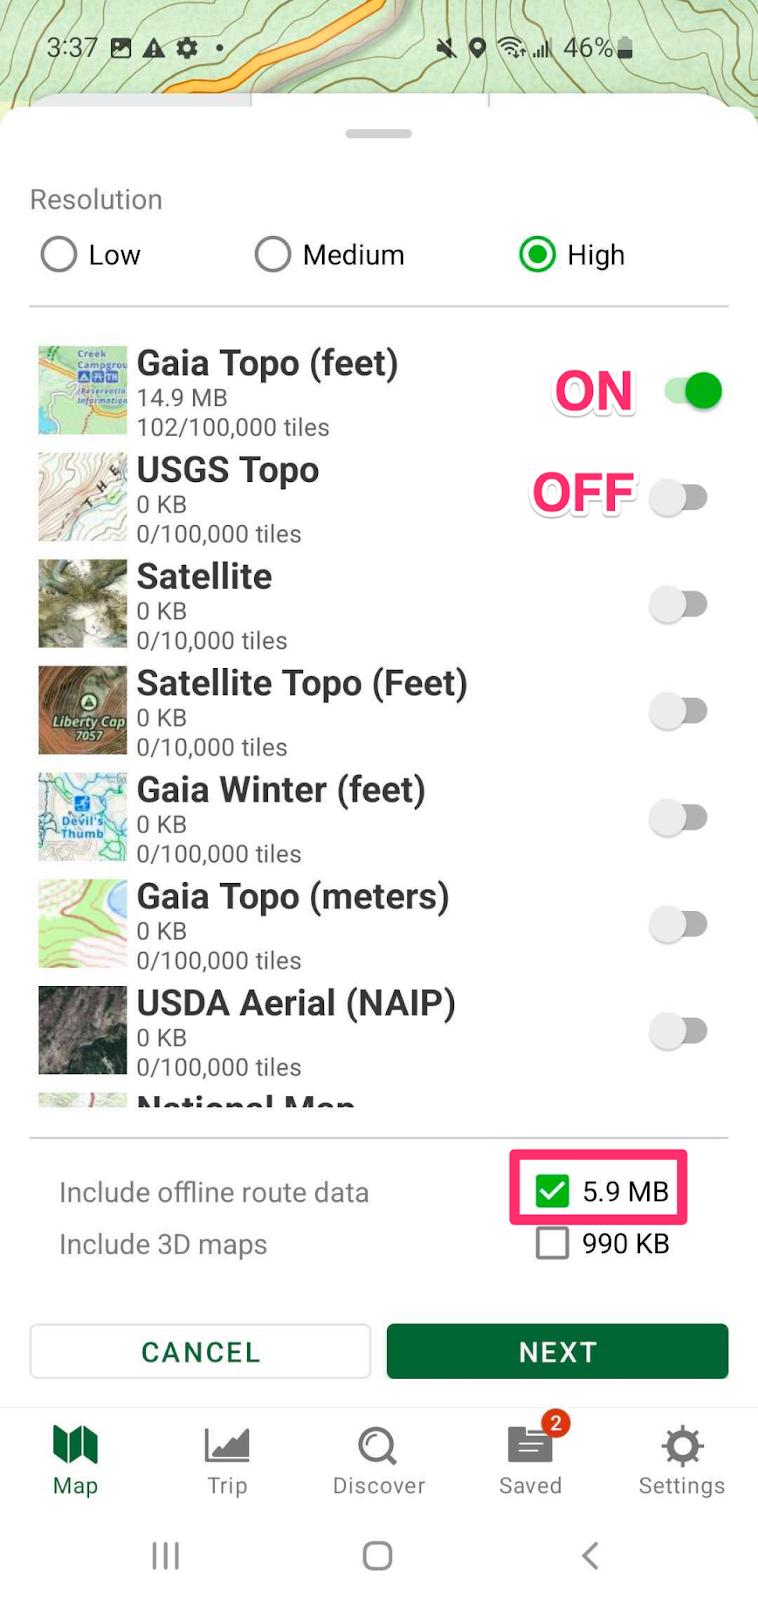
From the Name and Save screen, tap Download Maps. Toggle on the layers you want to download for offline use. If you'd like to create additional routes while offline, make sure the Offline Route Data is toggled on.
Please note a Gaia GPS Premium Membership is required to download offline maps.

Edit an existing route
1. Open the route details page by choosing the route from your Saved items or tapping on the route on the map.
2. Tap "Edit."
3. There are several ways you can edit your saved route:
- Add another point to the end of the route - Tap any spot on the map to add a new point to the end of your route. If the route doesn’t snap to the trail, tap the magnet icon so it is green to turn on snapping.
- Reposition points - Tap and hold a point, and then drag it to reposition it.
- Add points to the middle of the route - Tap and drag any of the interval distance markers to add a new point along the route.
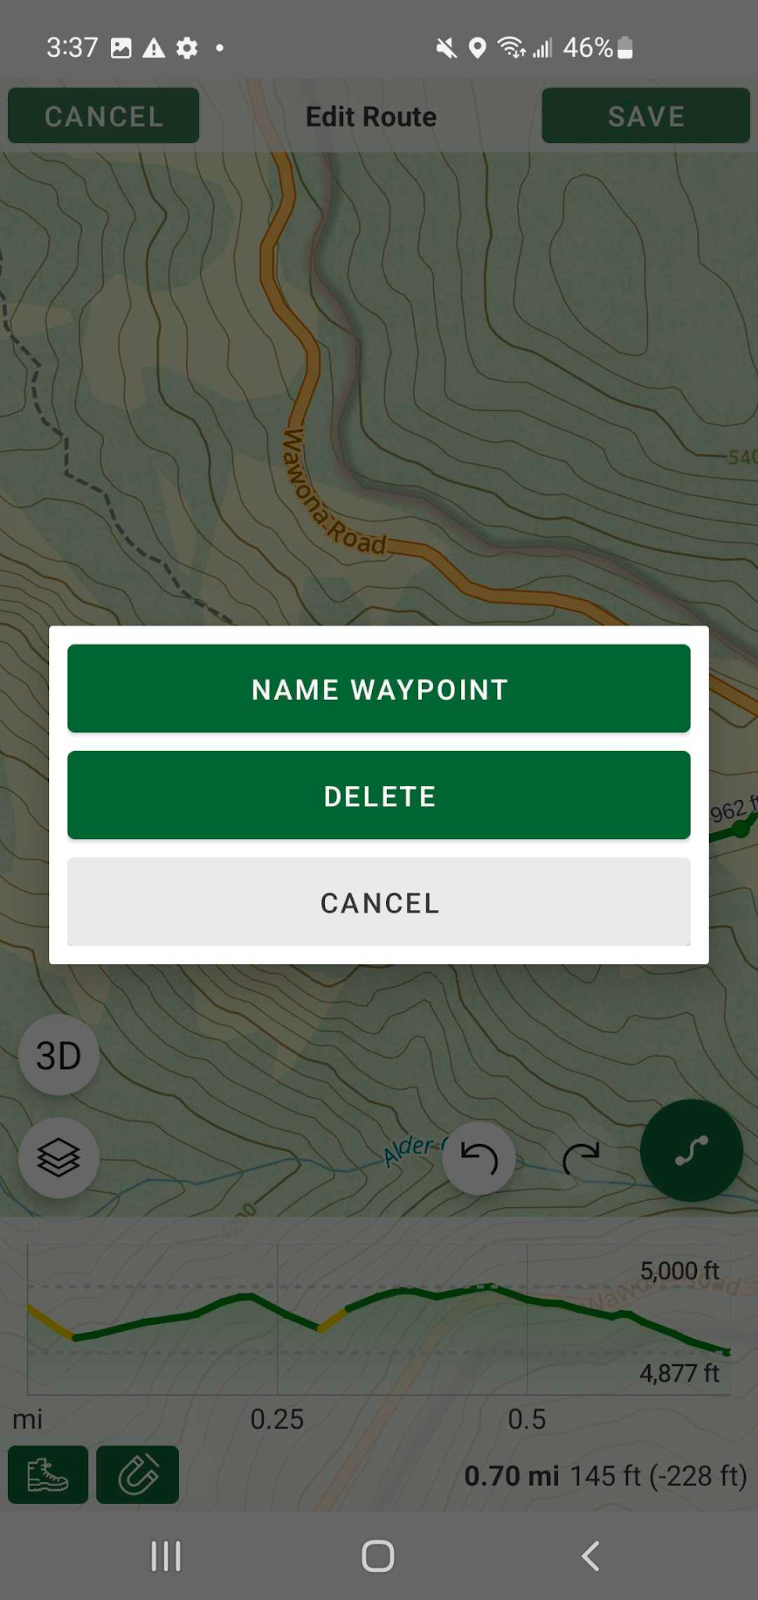
- Delete points - Tap on a point, tap the pencil icon and then select "Delete".
- Name a point - Tap on a point, tap the pencil icon and then select "Name Waypoint"
5. Tap "Save" to save your edits.
Reverse an existing route
You can reverse an entire route with these steps:
1. Open the route details page by choosing the route from your Saved items or tapping on the route on the map.
2. Tap Edit.
3. Tap the green auto-complete button.

4. Tap Reverse.
5. Tap Save
Common Questions and Troubleshooting
Route is not snapping to trail
1. Snap-to-trail routing only works with trails and roads displayed on Gaia Topo. Follow these steps to make Gaia Topo the active map layer.
2. If the green dots are not close to the trail/road, the line may not snap. Zoom in further and drag the blue dots directly on top of the trail/road.
3. If snap-to-trail is not working, when you are offline, it may be that you did not download offline routing data when you downloaded your map. Follow these steps to download offline routing data: Download Maps for Offline Use.